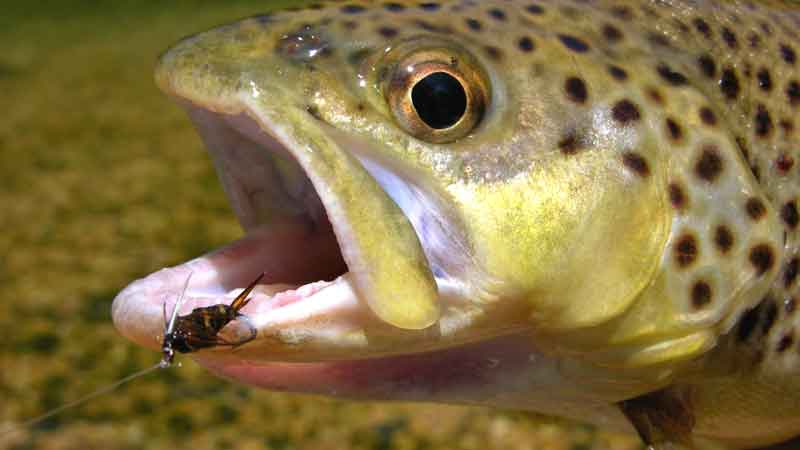
Fly fishing is more than just a method of catching fish; it's a harmonious blend of art, science, and tradition. Central to this pursuit is the practice of tying your own flies, which serves as both a creative outlet and a means to enhance your fishing experience. Tying flies allows anglers to tailor their tackle to match the specific insects or baitfish that local fish are feeding on, increasing the likelihood of a successful catch.

In recent years, fly tying has grown in popularity as a hobby and a vital skill for serious fly fishers. This detailed guide will walk you through the essentials of fly tying, from the basic tools needed to start, to selecting your first pattern, understanding the materials involved, choosing the right hooks, and learning cost-effective tips and tricks. Each section aims to provide you with comprehensive knowledge and practical tips that will help you tie flies that are functional and aesthetically pleasing.
The Basics of Fly Tying
Fly tying is a foundational skill in the art of fly fishing, enabling anglers to create custom flies that mimic the natural prey of fish. Understanding the basics of fly tying is crucial for anyone looking to enhance their fishing experience and increase their success on the water.
Essential Tools for Fly Tying:
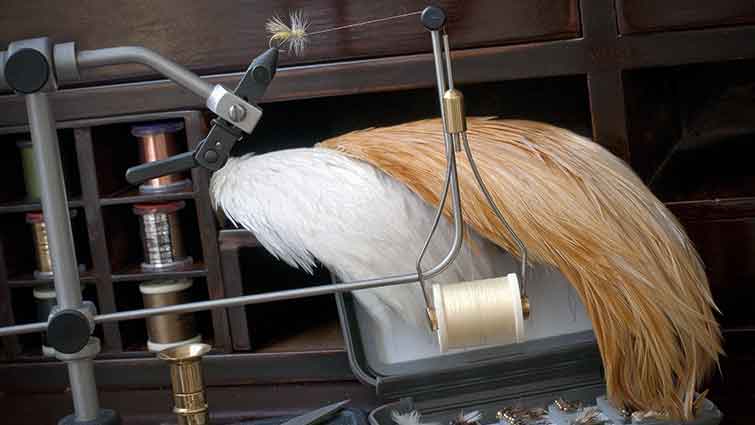
The primary tools for fly tying include a fly tying vise, bobbin holder, scissors, hackle pliers, whip finisher, bodkin, hair stacker, and head cement. The vise holds the hook securely, while the bobbin holder controls the thread tension. Sharp scissors are needed for precise cutting, and hackle pliers help wrap delicate materials around the hook. The whip finisher is used to tie the final knot, securing the fly, and the bodkin is useful for applying head cement and picking out fibers.
Materials:
Common materials include hooks, threads, feathers, furs, and synthetic materials. Hooks come in various sizes and styles, tailored to different types of flies. Threads are available in multiple colors and thicknesses, and feathers from roosters, pheasants, and other birds are frequently used for wings and tails. Furs from animals like deer and rabbits are used for body and tail components, while synthetic materials like chenille, tinsel, and foam add durability and variety.

Basic Patterns:
Beginners often start with simple patterns. Learning to tie flies can be both rewarding and beneficial for any fly fisher. Starting with simpler patterns helps beginners build essential skills and gain confidence.
Techniques:
Key techniques in fly tying include securing the hook, wrapping the thread, attaching materials, and finishing the fly with a whip finish knot. Mastering these basic steps is essential for creating durable and effective flies.
The History of Fly Tying and Its Evolution
Fly tying, the art of creating artificial flies for fly fishing has a rich history that dates back centuries. Its origins can be traced to ancient Macedonia, around 200 AD, where the first recorded use of artificial flies for fishing was documented by the Roman author Claudius Aelianus. He described Macedonian anglers using hooks adorned with red wool and feathers to catch fish, a practice that laid the foundation for modern fly tying.

During the Middle Ages, fly tying saw significant developments in England. The earliest known manuscript on the subject, "Treatyse of Fysshynge with an Angle," was published in 1496 by Dame Juliana Berners. This work detailed various fly patterns and fishing techniques, marking a milestone in the formalization of fly tying knowledge. By the 17th century, the practice had become more sophisticated, with anglers like Izaak Walton and Charles Cotton contributing to the literature with their seminal book, "The Compleat Angler," which included detailed descriptions of fly patterns and their uses.

By Mike Cline - Extracted from Public Domain PDF version of The Dry Fly Fishermans Entomology-Mosely (1921), Public Domain, https://commons.wikimedia.org/w/index.php?curid=4985886
The 19th century was a golden era for fly tying, driven by the Industrial Revolution and the advent of new materials and technologies. Silk threads, gut leaders, and improved hooks became widely available, allowing for more intricate and durable fly patterns. This period also saw the rise of iconic fly tyers like Frederic M. Halford and G.E.M. Skues, who pioneered dry fly and nymph fishing, respectively. Their innovations and writings significantly influenced fly tying techniques and philosophies, emphasizing the importance of matching the hatch—creating flies that closely resemble insects in a particular fishing environment.
In the 20th century, synthetic materials such as nylon, polyester, and various types of foam were introduced, revolutionizing fly tying. These materials offered greater durability, buoyancy, and a broader range of colors and textures, enabling fly tyers to create more realistic and effective flies. Additionally, the advent of rotary vises and specialized tools made the tying process more efficient and precise.

Today, fly tying continues to evolve with advancements in materials and techniques. The internet and social media have democratized access to fly tying knowledge, with countless tutorials, forums, and online communities dedicated to the craft. Modern fly tyers can instantly share patterns, innovations, and tips, fostering a global exchange of ideas and pushing the boundaries of what is possible in fly tying.
From its humble beginnings in ancient Macedonia to today's sophisticated and innovative practices, fly tying has undergone a remarkable evolution. This progression reflects broader changes in technology, materials, and angling philosophies, continually enriching the art and science of fly fishing.
Tools Needed for Tying Flies
Before you begin tying flies, having the right tools is crucial. Here are the essential tools you'll need:
Fly Tying Vise:

This is perhaps the most important tool, as it holds the hook securely while you work. Invest in a quality vise that offers adjustable jaws and stable support. A rotary vise can be particularly useful as it allows you to rotate the hook and view your work from different angles.
Bobbin Holder:

This tool holds your thread spool and allows you to control the thread tension while tying. A good bobbin holder with a ceramic insert will help prevent the thread from fraying and breaking.
Scissors:

Sharp, fine-tipped scissors are necessary for precise cuts. You'll need a pair for cutting thread and another pair for trimming materials. Micro-tip scissors are great for detailed work, while heavier-duty scissors are ideal for cutting tougher materials.
Hackle Pliers:

These help in wrapping feathers and other materials around the hook. Look for hackle pliers with a good grip to avoid slipping while wrapping delicate materials.
Whip Finisher:

This tool helps in tying the knot to finish off your fly, ensuring it doesn’t unravel. Mastering the whip finish knot is essential for creating durable flies.
Bodkin:

Essentially a needle on a handle, this tool applies head cement and picks out trapped fibers. A bodkin can also be useful for teasing out dubbing to create a more buggy appearance.
Hair Stacker:

This helps in aligning the tips of hair fibers used in some fly patterns. A hair stacker ensures that the hair fibers are even, creating a neat and professional look.
Head Cement:

A type of glue used to secure the final knot and ensure durability. Head cement can also add a glossy finish to the head of your fly, making it more attractive to fish.
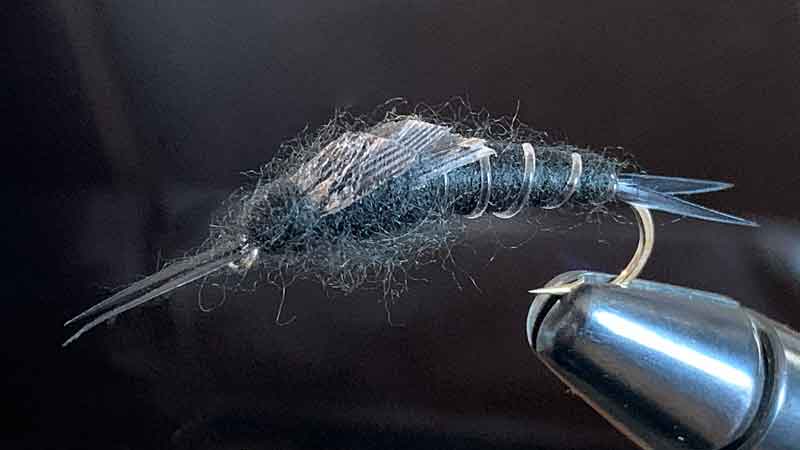
Choosing Your First Pattern to Tie
When starting, choose a pattern that is both simple and effective. The Pheasant Tail Nymph is an excellent choice for beginners. The Pheasant Tail Nymph is a classic fly pattern that mimics a wide range of mayfly nymphs. It is renowned for its simplicity and effectiveness, making it a staple in any fly fisher’s box. Here's a step-by-step guide to tying a Pheasant Tail Nymph:

Materials Needed:
- Hook: Nymph hook, sizes 12-20
- Thread: Brown or black, 6/0 or 8/0
- Tail: Pheasant tail fibers
- Ribbing: Fine copper or gold wire
- Body: Pheasant tail fibers
- Thorax: Peacock herl
- Wing Case: Pheasant tail fibers
- Head Cement (optional)

Step-by-Step Instructions:
- Secure the Hook: Place the nymph hook in your vise and secure it tightly. Start the thread behind the hook eye and wrap a base layer to the bend of the hook.
- Tie in the Tail: Select 4-6 pheasant tail fibers and align their tips. Measure the tail length to be about the same as the hook shank. Tie in the fibers at the bend of the hook and wrap the thread forward to secure them.
- Add the Ribbing: Tie in a length of fine copper or gold wire at the same point where you tied in the tail fibers. Let the wire hang to the rear of the hook.
- Create the Body: Take the remaining length of pheasant tail fibers (used for the tail) and wrap them forward to form the body, stopping about two-thirds of the way up the hook shank. Secure the fibers with a few wraps of thread.
- Rib the Body: Wrap the copper or gold wire in even, open turns over the pheasant tail body to create segmentation. Secure the wire with thread and trim any excess.
- Tie in the Wing Case: Select 4-6 more pheasant tail fibers and tie them in at the point where you left off the body. These fibers will be pulled over later to form the wing case.
- Add the Thorax: Tie in one or two strands of peacock herl by their tips and wrap them forward to create a thorax. The thorax should be thicker than the body, giving the fly a more natural profile. Secure the peacock herl with thread.
- Form the Wing Case: Pull the pheasant tail fibers (tied in for the wing case) over the top of the thorax and secure them just behind the hook eye. This creates a wing case effect.
- Finish the Fly: Form a small thread head, whip finish, and cut the thread. Apply a drop of head cement to the thread wraps to ensure durability.

Tips for Tying:
- Maintain even tension on the thread to avoid breaking delicate materials like pheasant tail fibers.
- Use a rotary vise if available, as it makes wrapping materials more consistent and easier.
- Adjust the size of the materials based on the size of the hook to keep proportions natural.
The Pheasant Tail Nymph is a versatile pattern that can be fished in various conditions and is effective year-round. Mastering this fly will add a reliable and productive option to your fly box.

Materials Used in Tying Flies
Understanding the materials used in fly tying is crucial for creating effective flies. Here are some common materials:
- Hooks: Available in various sizes and shapes, designed for specific types of flies. Brands like Mustad, Tiemco, and Gamakatsu offer high-quality hooks.
- Thread: Comes in different colors and thicknesses. Choose the thread that complements your fly pattern. Danville and Uni-Thread are popular choices among tiers.
- Feathers: Used for wings and tails. Hackle feathers from roosters are commonly used. Pheasant tail, peacock herl, and turkey feathers are also popular.
- Fur and Hair: Used for body and tail materials. Deer hair is popular for creating buoyant flies. Rabbit fur, fox fur, and elk hair are also commonly used.
- Synthetic Materials: Includes chenille, tinsel, and foam, offering durability and variety in colors and textures. Materials like Krystal Flash and Flashabou add an attractive shimmer to flies.
Picking the Correct Hook for the Pattern

Choosing the right hook is vital for the success of your fly. Hooks come in various sizes and styles, each suited for different fly patterns and fish species.
- Dry Fly Hooks: These are lightweight with a narrow gape, designed to float on the water surface. They are typically used for flies that mimic insects on the water surface.
- Wet Fly and Nymph Hooks are heavier with a wider gape and designed to sink below the surface. These hooks are used for patterns that mimic underwater insects and larvae.
- Streamer Hooks: Longer shank hooks used for larger flies that mimic baitfish. These hooks are strong and designed to handle larger fish.
- Specialty Hooks: These include hooks designed for specific patterns, like the scud hook for shrimp patterns. They also include jig hooks and curved hooks for specific fly designs.
- Hook Sizes: The hook size you choose will depend on the type of fly you're tying and the fish you're targeting. Generally, smaller hooks (sizes 18-24) are used for small dry flies and nymphs, while larger hooks (sizes 2-8) are used for streamers and larger patterns.
Tips and Tricks to Save on Time and Money Tying Your Own Flies

Fly tying can become an expensive hobby, but there are ways to save both time and money:
- Buy in Bulk: To save money, purchase materials like hooks, thread, and feathers in bulk. Online retailers and fly tying clubs often offer discounts for bulk purchases.
- Use Substitutes: Experiment with less expensive materials that offer similar characteristics. For example, synthetic dubbing can be a cost-effective alternative to natural fur.
- Recycle Materials: Repurpose materials from old flies or other sources. For example, feathers and fur from hunting trips or old garments can be used in fly tying.
- Organize Your Workspace: To streamline your tying process, keep your tools and materials organized. Use storage boxes, trays, and magnetic strips to keep everything in place.
- Practice Efficient Techniques: Learn and practice efficient tying techniques to save time. Watching instructional videos and taking tying classes can improve your skills and speed.

Additional Tips:
- Join a Fly Tying Club: Joining a club can provide access to shared resources, bulk purchasing opportunities, and valuable advice from experienced tiers.
- Attend Fly-Tying Shows and Expos. These events often feature vendors offering discounts on materials and tools, as well as demonstrations by expert tiers.
- Use Multi-Use Patterns: Focus on tying patterns that can be used in various fishing situations.
- Keep a Tying Journal: Document your tying sessions, noting the materials used, techniques applied, and results in the water. This can help you refine your patterns and improve your tying efficiency over time.
Tying your own flies for fly fishing is a fulfilling and practical aspect of the sport. By having the right tools, choosing a simple pattern, understanding the materials, selecting the correct hook, and applying cost-saving tips, you can create effective flies that enhance your fly fishing experience. Whether you are a beginner or an experienced angler, the journey of tying your own flies will undoubtedly add a new dimension to your fly fishing adventures.
With practice and patience, you'll find that tying flies improves your fishing success and deepens your connection to the sport. The ability to create and customize your own flies allows for a greater understanding of the aquatic insects and baitfish that fish feed on, ultimately making you a more effective and knowledgeable angler.